
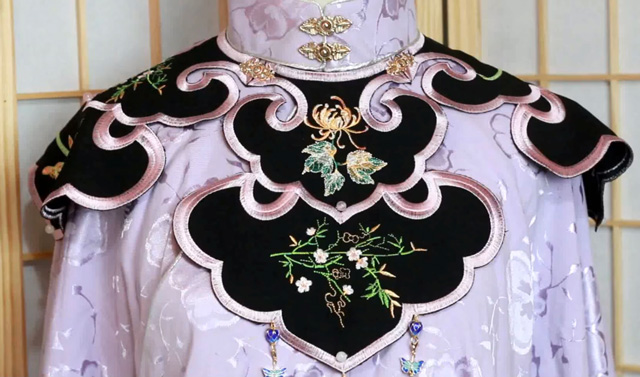
Introduction
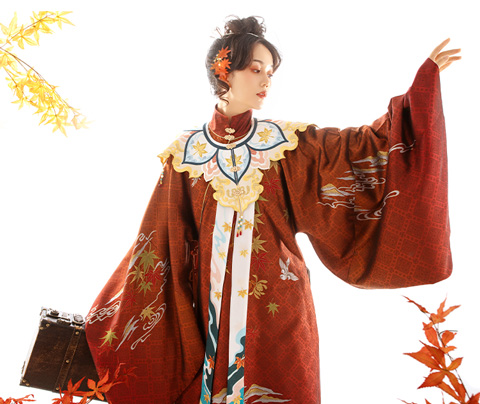
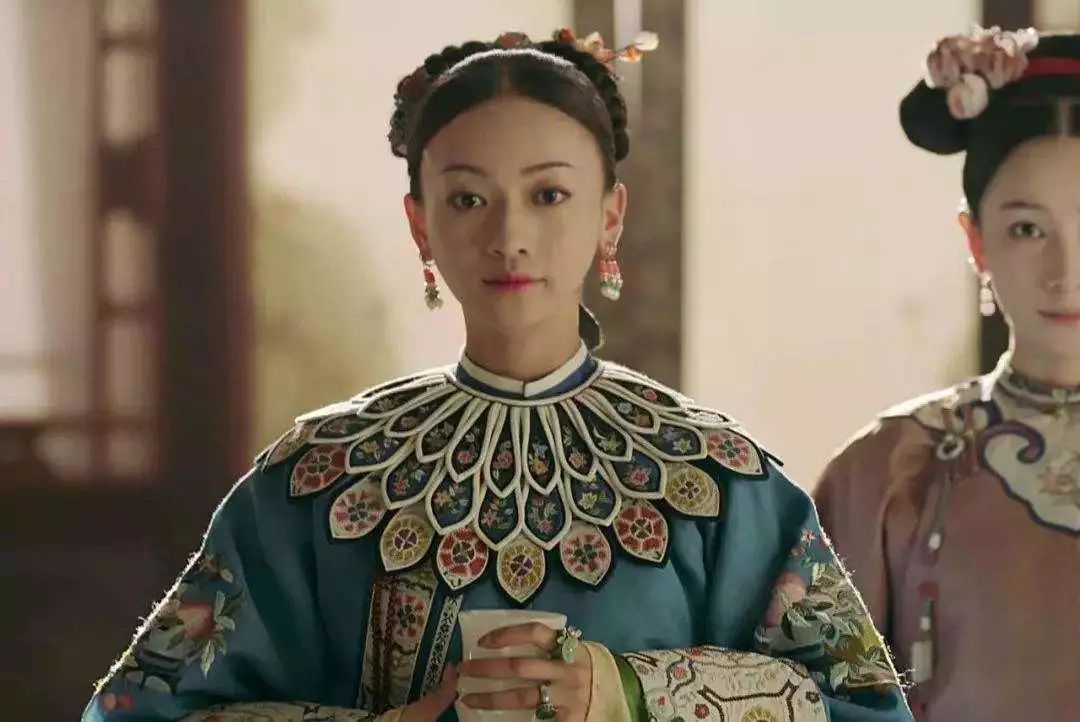
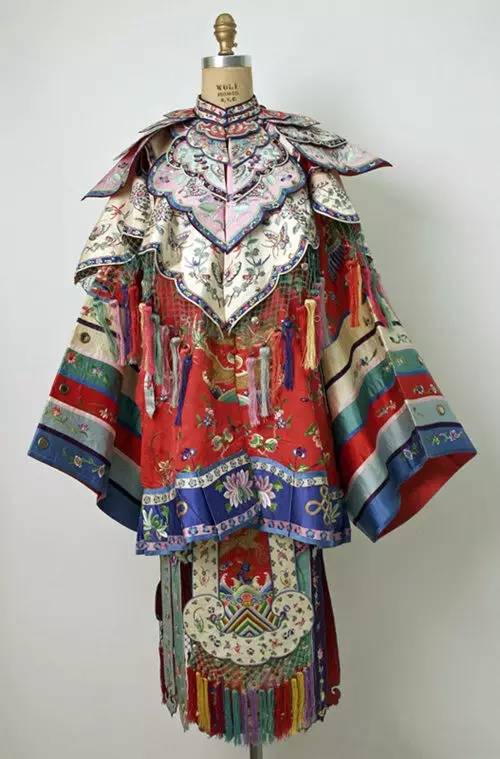
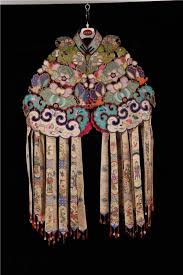
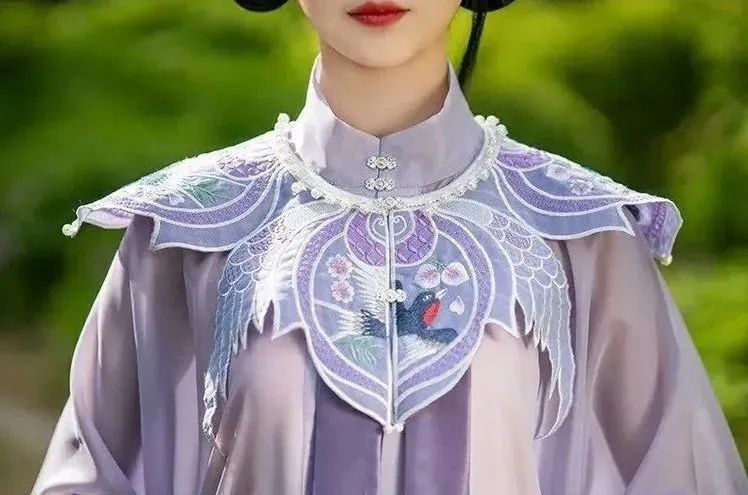
Yunjian (云肩), is considered to be one of hanfu's accessories. It is often matched with Ming Dynasty clothing, such as long tops (长袄) and folded skirts, known as mǎ miàn qún (马面裙).
Those interested in hanfus might be interested in making their own, including yunjian. But, when it comes to making yunjian, there have been little videos that give the full process of making it from scratch. There are, however, kits that can be bought and you just have to attach the pieces. Or, you can just buy the finished product from stores that sell it to match your hanfu set.
The reason that there haven’t been many tutorials for yunjian making could be because of the complicated embroidery techniques that are used. Despite yunjian being something small, the intricate designs can require long hours just on sewing itself.
If you have a sewing machine, it’ll fasten your pace on the designs, making it much easier for you to do the DIY process.
I’ve looked through videos and articles showing steps of yunjian making and I’ll group them here for anyone interested. The steps may be rough, but you’ll get the overall idea of what’s occurring to get the yunjian many people see online nowadays.
General Templates and Collar
Before beginning, a bit of information to add. Whatever styles you choose, the main idea is to have the pieces branch out from the inner circle that will be wrapped near the neck.
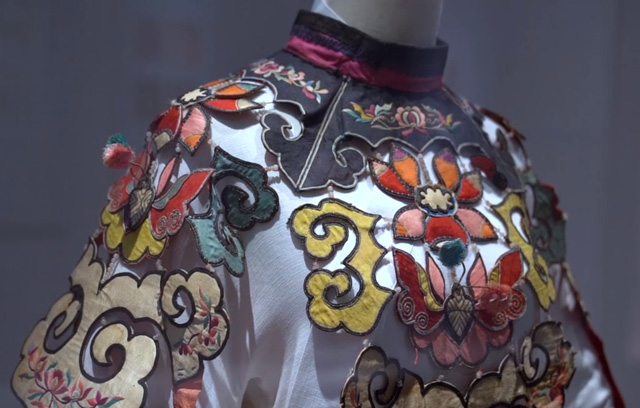
Then, there are also yunjian that have (stand-up/立领) collars or yunjian that don’t have collars at all. Most yunjian you know of now do not have a collar. The exposed collar part would be from the top with a collar underneath.
Below is images showing the difference; (#1 with collar. #2 without.)
Length to Looks
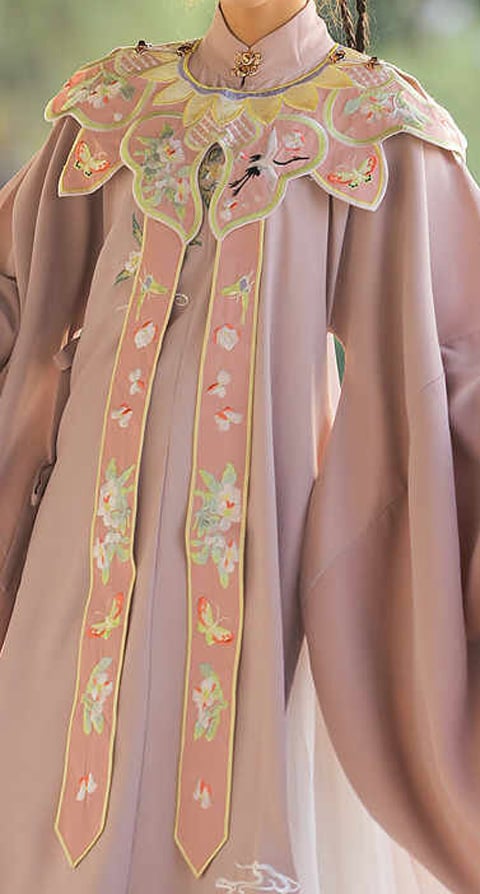
All yunjian can looked the same with the styles, shapes, and embroideries changing them up to look slightly different. But there is one thing that needs to be paid attention to. And that is the lengths.
When you are creating your yunjian, you will need to measure the length(s) for your pieces and the overall shape. This is when you decided how of big of a yunjian you want. Should it be ending where your shoulder ends? Or should the length be longer for each peices so that it droops down your shoulder with accessories attatched?
Here is images to show the differences; (#1 ends at shoulder's edge or smaller. #2 surpass shoulder's length and drooped down to preferred height with accessories attached.)
Steps of Yunjian Making
Step 1: decide on a style and shape
To begin, look up and decide on a style and shape you want your yunjian to be.
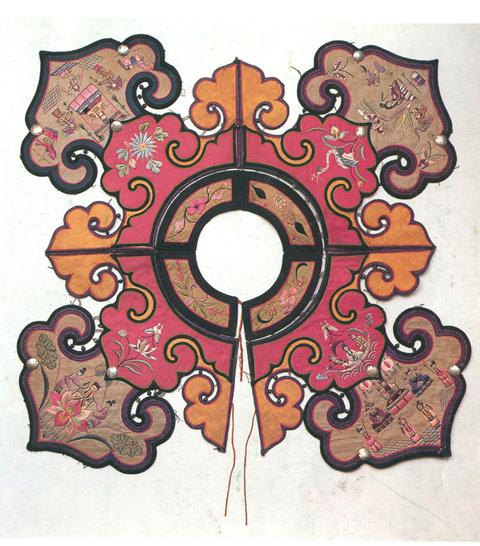
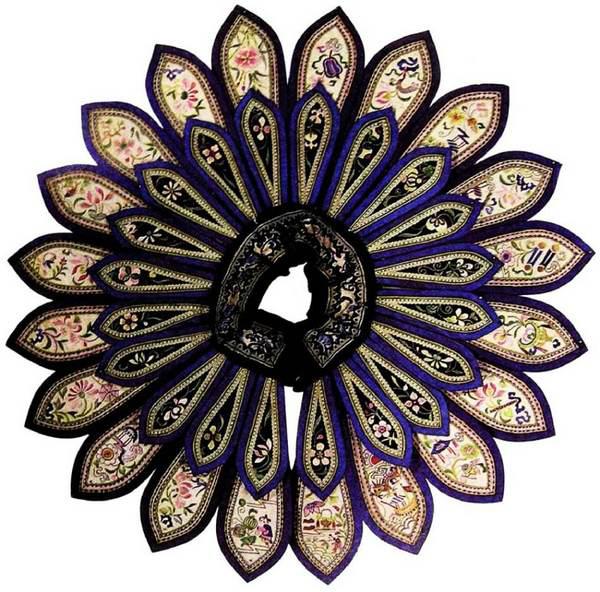
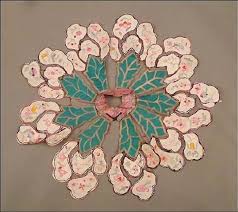
- Styles in this case, means the shapes each part of the yunjian pieces looks like, and how many directions it branches out from the middle.
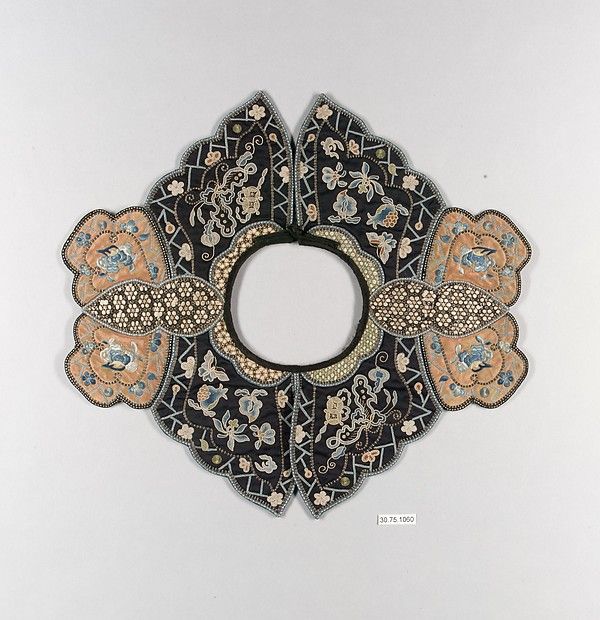
- Here are just a few styles, names ordered according to images - Sihe Ruyi (四合如意式), Willow Leaves (柳叶式), Lotus (莲花式), Gourd (葫芦式), and Mash-up (混搭式).
- (You can also layer different styles of yunjian together instead of just one layer.)

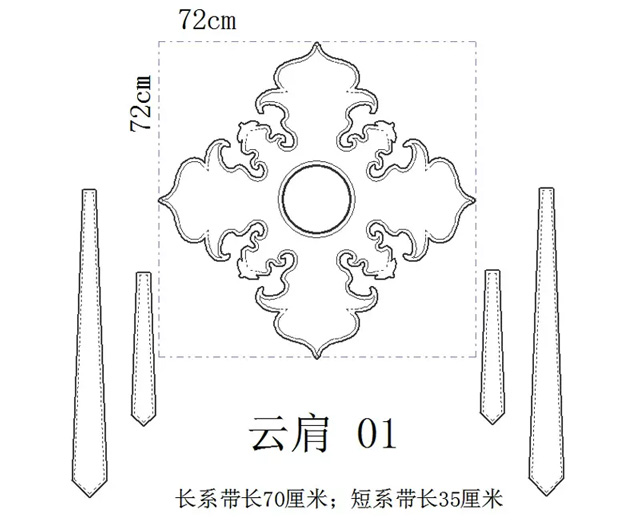
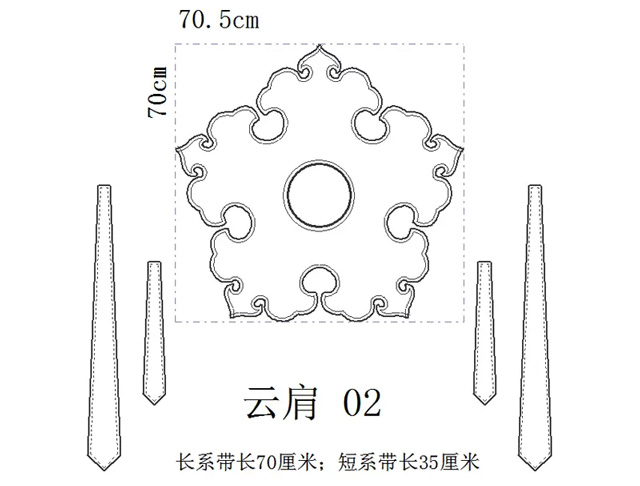
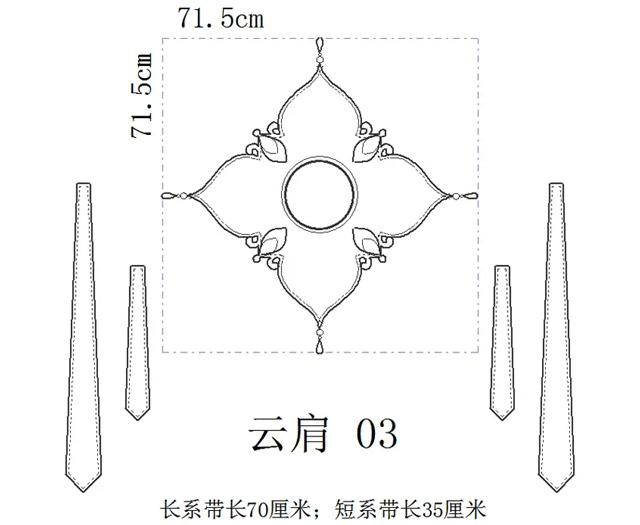
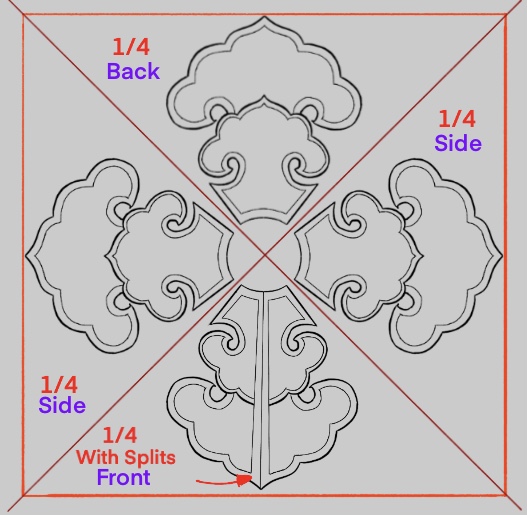
Step 2: confirm the length and height templates
Next, you have to confirm the length and height templates. (Most yunjian more or less takes on rectangle or square format. It’s drawn with red lines in the image below.)
- The length of your neck + a few centimeters of space before reaching the inner circle edges.
- Length of each yunjian piece before pieced together. ("Length To Looks" section of this article.)
- Width(s) of each piece, so the inner edges of each piece can get sewn up neatly to form a circle/oval for the neck.
I've attached a few templates I found online with any information regarding the measurements. (You can change to your liking or use those measurement directly.)

Step 3: sketching
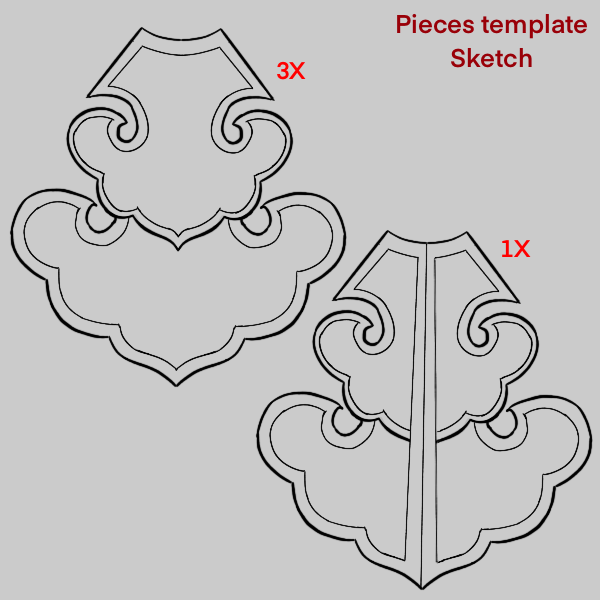
With the styles and measurements down, you can start sketching out template pieces on paper, cardboard, or anything that allows you to cut out the sketch and transfer it to cloths. For this tutorial, I’ll use Sihe Ruyi (四合如意式) cloud style. Since it’s going in four directions, there are a total of four pieces I need to make.
The pieces for this style all matched. So instead of drawing the same shape four times, I’m only drawing ¼ of the yunjian pieces once. ¾ of the pieces will be cut out from the same sketch. The other 1 piece will be where I split the piece in half to leave space for buttons. (Sihe Ruyi styles have one piece split for buttons, which will be at the front of the chest. Look at first image below;) Depending on your chosen yunjian style, you may not need to split a piece just to add buttons.
All of this will be drawn digitally to show every detail. But you’ll need to create the sketch physically for cutting.
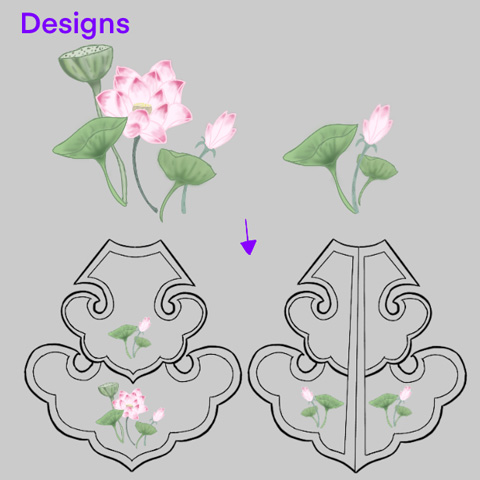
With the general shape down on paper, you then start sketching out the design you want on the yunjian. They can be the same design on all pieces or different.
Yunjian has two main types of design. Scattered small designs throughout, or one concentrated design with the remaining space empty. I choose to have one concentrated design. But it’s in the middle, which won’t fit the piece with a split down the center. So I changed the design for that one.
Example images of designs; (#1 scattered smaller designs. #2 concentrated design. #3 My designs for this tutorial)
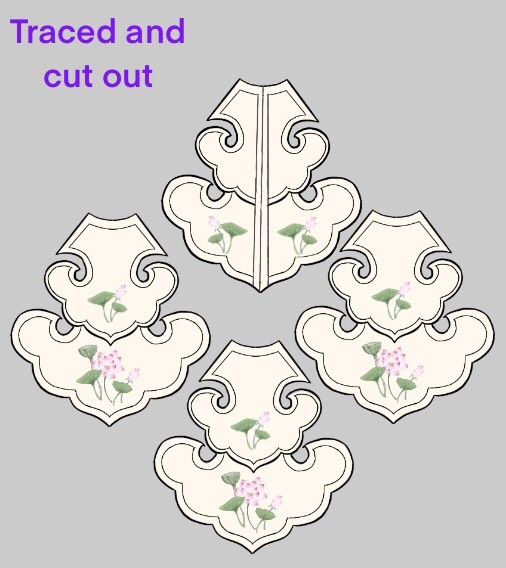
Step 4: cutting out the sketches
You can start cutting out the sketches. Trace it lightly on the cloth of your choosing. If you have a washable pen/marker it’ll make the outline on cloth easier to wash off.
(Yunjian mostly used one colored cloth and embroidered other colors on top. But you have the option to choose cloth in many colors.)
Step 5: cut out the pieces of cloth
Depending on your preferences, you might like the pieces to have two layers sewn together or just one layer. If it’s two layers you just double the amount of cloth you need to trace and cut out and sew two pieces together to make one.
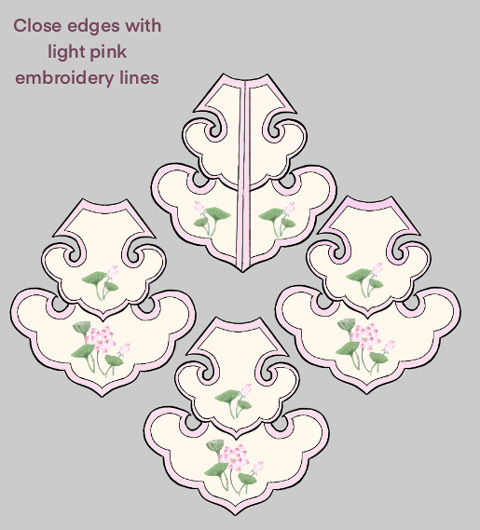
For each cut-out, you will need to close the edges with a string color of your choosing. (Similar to present clothes where the edges of the cloth are folded inward and then sewn to prevent the strings from fraying quickly.)
If it’s two layers, lay them together then start closing the edges. The technique for closing the edges depends entirely on your preferences (or sewing machine.)
The pieces with the split follow the same step to closing the edges. Don’t forget the middle where the split also needs to be closed. (example of the closed edge below;)
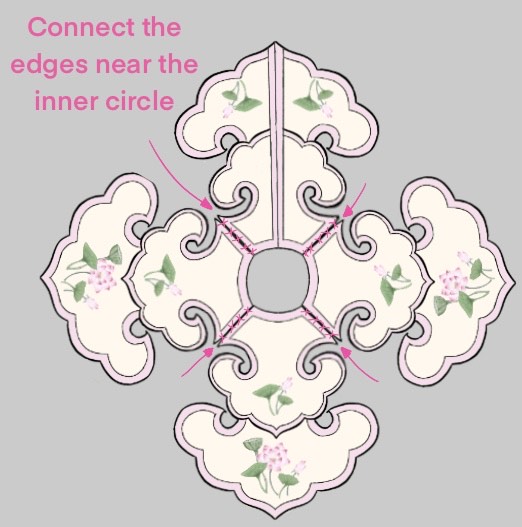
With the edges close, you can then start sewing the pieces together by their edges so it formed a circular pattern, showing the shape of yunjian.
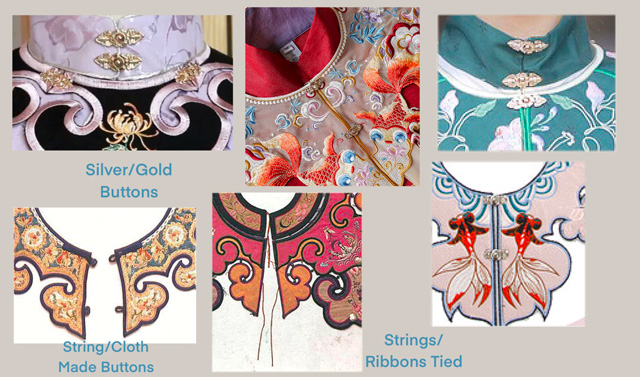
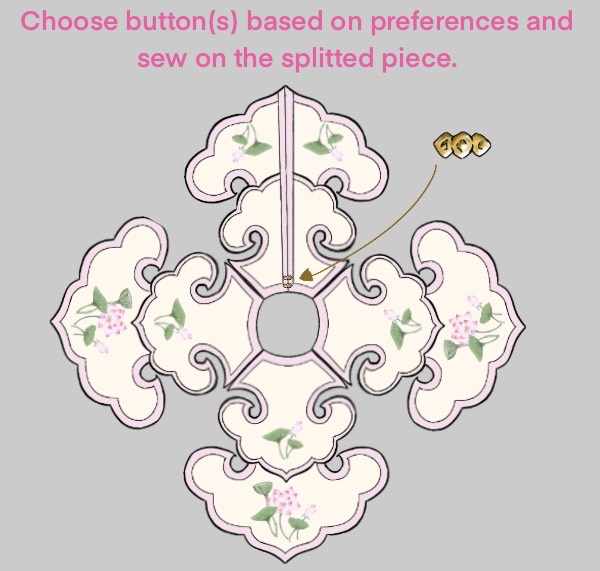
Then choose a button style that you want to use on that yunjian, and sew it on the piece with the split, in the middle.
Here is a few example imgaes of buttons or ribons to connect the splitted part of yunjian.
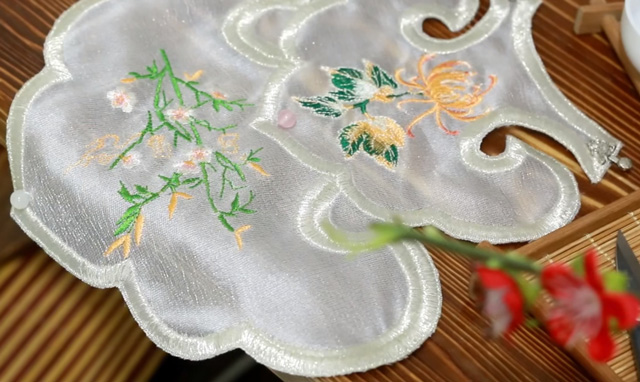
Step 7: design of embroidery style
Now you’re almost finished with your yunjian. Now it’s all on the design embroideries. When you transfer the cut-out to cloth, you may or may not sketch out the design shape as well. If you didn’t you can just do another cut-out of only the design and trace it on the half-finished yunjian.
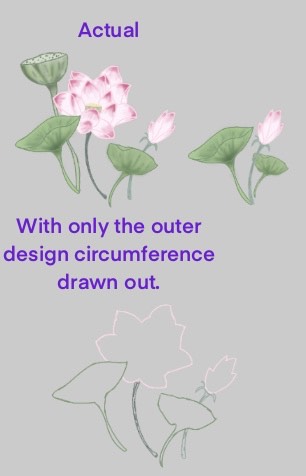
- If your designs have many depths, it can be difficult when you only have the outer circumference of the design shape.
- If you are skilled in embroidery and don't need anything else besides the circumferences drawn, you can start sewing. But most people need a template to follow.
In this case, you can also sketch out the inner outlines for each part to make it easier for you, and eyeball the gradients of colors as you sew.
Or buy water soluble embroidery films. You can transfer your sketch and lightly color onto the film (allows you to follow when you need to switch thread colors), and pin it on the area on the yunjian you want the design to be at. Then start sewing. Once done, the film will be hidden under the embroidery stitches, but you can remove the film by dipping it in water a few times without messing up the finished embroderies too badly.
Step 8: add more decorations
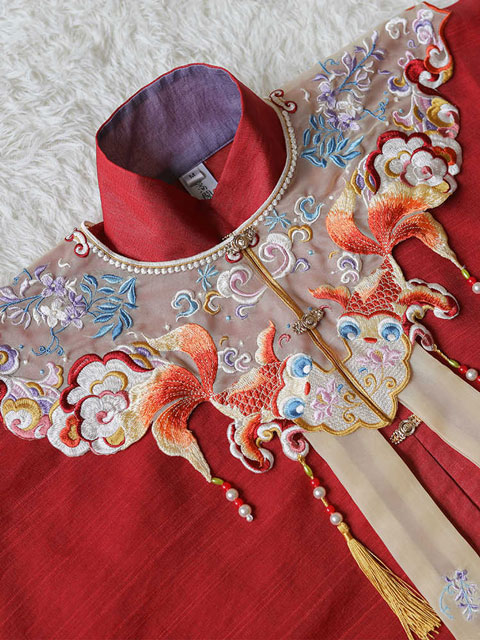
With that completed, you are pretty much done with the yunjian. Unless you want to add more decorations, such as beads, tassels, bells, etc.
- If you want to add beads you just have to sew the bead onto the part of the yunjian where you want it to be located.
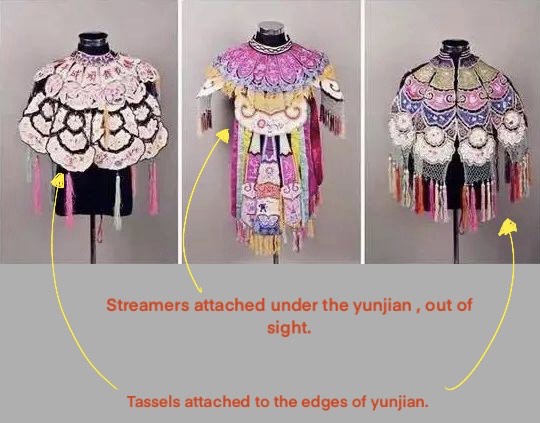
- If you want to add streamers. Sketch out the shape and length (design if you want to add them too). Trace it on the cloth of your choosing. Cut (tassels will need two layers of cloth sewn together). Sew the edges together. Flip it inside out so the sewing lines are hidden. Embroider the design if you have one. Close the end as well. And sew the end under the yunjian so the connected edges are hidden from visible eyes.
- To add tassels, you can just attach them at the edges of the yunjian.
Depending on your yunjian and the pieces it’s made of, you might not need to split the pieces in half to add buttons. you can also just add the buttons where the edges of each piece are connected instead of sewing them together.
The Sihe Ruyi style is known to have one branch at the front of the chest. I'm just following the traditional button placement. You can just sew the button where the edges to connect each pieces is supposed to be sewn close.
Example images of button placements; (#1 traditional split on front piece. #2 connecting yunjian pieces with buttons instead of sewn up.)

The above is the steps I shared about Yunjian making, if you are ready to make Yunjian or have questions about the steps, welcome to discuss with me in the comment section.

More about Yunjian you may like:
Thanks for the tutorial👍👍👍
Thanks
Thank you for the tutorial!
Thank you so much, I can't wait to start making my first yunjian!
Finally! thanks a lot! This is pretty much how I thought the process should be, but I needed confirmation. How about a interfecing leyer? do the pieces need to be stiffened?
If it’s interfacing layer I believe it usually added in between layers or can serve as the second layer on the inner side of yunjian when worn. Like there is two layer of fabric, in the middle of that. If there’s one layer the fabric will be on top, visible to the eyes and the interfacing layer behind. Since the main purpose of interfacing is slightly stiffening and give the cloth more ability to shape. Of course the more layer there is the stiffer the overall pieces will be. It also depend on the material from the interfacing layer you are using. If you preferred the yunjian to not be too stiff then you can just have one layer of fabric and one interfacing layer.
Thanks for this! I really didn't know anything about yunjian.